Showing posts with label arts and crafts for kids. Show all posts

Sunday, October 17, 2010

Revealing Design

Experiment # 7: Bleach Art

You will need: An old plain colored cotton t-shirt
(cut a squarish piece - any size you want to
work with will be perfect); cotton bud; house bleach (a capful)

Young children might get too curious with bleach.
It isn't safe to have them handle it alone.
Please be around around to supervise
them throughout the whole exercise,
and remember to be very careful at all times.

Safety first in all things you do.

This activity is a lot of fun, and almost magical to some eyes :)


Lay your piece of cloth flat on newspaper or any
piece of paper thick enough to protect the table
you're working on. Dip the cotton bud into the bleach and
start dabbing the piece of cloth with dots,
lines or curved lines. Watch what happens :)

Isn't that so neat?

The bleach changes the color of the dyed fabric.
A different color will always be revealed depending
on the shirt color you use. It's a chemical reaction
between the bleach and the type of dye used.

Keep on dabbing.


Wasn't that fun? :)

Friday, October 15, 2010

The Golden Girl by Heather

Experiment # 6: Drawing and Painting on Plaster of Paris

You will need Plaster of Paris, water,
a plastic plate, a stick for drawing,
a paintbrush and some paint.

Mix the Plaster of Paris and pour it into the plastic plate.
Just before the plaster hardens, have the child draw
whatever she/he wants to draw.

Let the plaster harden.

Here, Heather discovered that the base was nice and smooth,
so she painted the base instead. In gold.
She seemed so pleased with herself :)


•••
Exposing children to different media is important.
There is a world, bigger than paper, where children
can express their creativity in.

Creativity is very important in educating a child.
We must value it as much as most parents
value mathematics and sciences.

Sir Ken Robinson explains why.

Jean-Michel Basquiat by Heather

Experiment # 5: Scraperboard ~ Engraving Paper

Lesson number 1...One must never stop a child
from adding color to her art.

Lesson number 2...Scraperboard is not appropriate for a
5 year old. Black and white just isn't enough for them.


This experiment didn't go entirely wrong.
Its just that I expected that it would be interesting
for a five year old to "draw" with a reverse effect.
Heather seemed to enjoy this exercise for 2 minutes
then she requested for some color.

I think we have another Basquiat amongst us.

Plaster of Paris Sea Creatures by Heather

Experiment # 4: Pouring Plaster of Paris in Molds

You will need:
• Sea World mold by Knorrpandell
(There are other molds you can choose from at Art friend.
Soap, candle and chocolate molds also work
well with Plaster of Paris. I prefer Knorrpandell molds
since they make lots of interesting designs.)
• 1 kilo of Plaster of Paris
• A mixing bowl
• Water
• A disposable mixing stick
• Acrylic (Marie brand) or poster paint (Sakura brand)


Before you start this exercise, line your table with a plastic sheet.
Don't be like me and use bubble wrap surplus.
Heather spent a good 5 minutes popping those bubbles
before I finally had her attention!

Mix the Plaster of Paris. Follow these instructions.
Pour the mixture in each sea creature mold.

Let it dry.

You will notice that it hardens quite quickly.
Feel the surface once it looks like the moisture has evaporated.
You will notice that at first, it will be very cold.
It's like holding a wet porous stone. Then in minutes,
it starts to get very, very warm. I made Heather touch it,
she seemed fascinated :) Plaster of Paris is quite safe for children.
Just make sure that you assist them if you feel that they
are too young to do it themselves. Let them mix, let them pour.
Always involve them. It's an important part of the creating process :)


Remove the dried plaster from the mold.
Then prepare to be amazed.
I didn't tell her how to paint any of these sea creatures.


(Heather is one of my students in my Art Camp Experiment.)

Thursday, October 14, 2010

Two Different Ways To Rub A Leaf

Experiment # 3.1 and 3.2: Leaf Rubbings

You will need:
leaves, paper, pestle, watercolor pencils, paint brush


~ Experiment 3.1 ~

One:
Position your leaves on the paper
however way you wish. Occupy only half the sheet.

Two:
Hold the leaves in place by folding the paper in half
over the leaves.

Three:
Take the pestle and rub. Rub hard until you see the leaves'
juices seep through your paper.


Four:
Unfold the paper and cut out the rubbed surface.


Five:
Label your leaves and you'll have your own botanical print :)

~ Experiment 3.2 ~

One:
Place the leaf underneath the sheet of paper.
Take one of your watercolor pencils. Rub over the
general area of the leaf. You will notice that a pattern will appear.


Two:
Take your paintbrush and dip it in water.
Brush along the edges of your rubbing.


Three:
It creates a lovely effect, don't you think?
Now try making your own. The more leaves/rubbings you have
on one sheet, the prettier your creation will be!

Watercolor Pencils are available at Art Friend.

Block Printing For Young Children

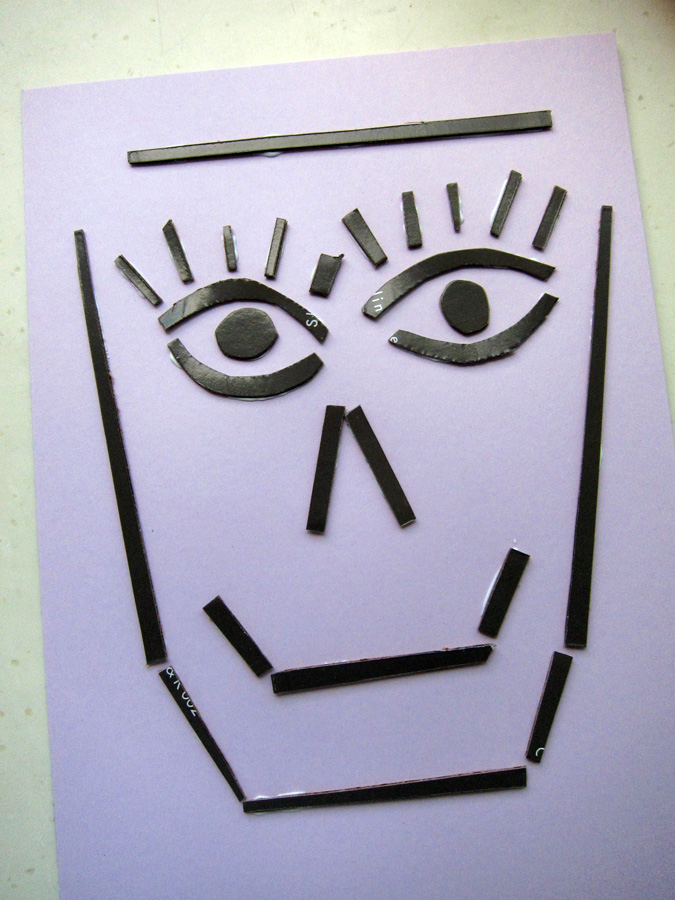
Experiment Number Two: Block Printing With Paper
(The more advanced method of block printing
uses Soft-Kut printing blocks. The version on this blog uses
paper strips since this exercise is designed for younger
children who are not able to control the use of a carving tool.
So for safety reasons, pre-cut paper strips work best.)


You will need:
•Strips of recycled corrugated board.
I used a shoe box for these strips
•A hard rubber brayer (roller)
•Block Print paint. Any color.
For this exercise, I've used black.
•Paper (5 or more pieces. Thin board quality.)
•Any plastic sheet - this will be used as the surface for spreading
the block print paint. Prepare a small piece of board that will be
used as a spatula to spread the paint on the plastic sheet.
•White glue


Position the pre-cut strips to form your design.
Make sure that the glossy (or printed) side of the
board faces up. The more absorbent side should be
face down - the glue will work it's magic easily
on the more porous side. Next...


...glue your design onto the paper.


Place a heavy book over your design.
A heavy book helps flatten your glued strips.
It also ensures that your design will be printed
with all your elements on the print.

Now comes the messy part.
Don't worry, this block print paint
is water soluble. All you'll need is soap
and water to make the mess disappear.


Cut a piece of board. This serves as a make shift spatula.
Spread a thin layer of block print paint.
Try to spread it as evenly as possible.

Place your paper face down onto the plastic sheet.
Rub it gently so that all the paper strip surfaces
get a bit of paint on it.


Lift it up, lay it on the table. Face up.
This is called your printing plate.
Don't worry about the paint drying up.
Block print paint is formulated to stay
moist for just enough time so that you
can make as many prints as you wish.

Place a blank sheet of paper onto your printing plate.
Take the rubber brayer and roll it over the paper.
Be gentle. You just want the paint on the printing plate
to touch the surface of your blank sheet.

Now peel it off...Voila!!! You have your print!


You can do this process over and over again.
Each print is the same design but it will always have
it's own unique mark.

Have fun!!! Please remember that children will need your
assistance, love and patience for this project :)


(All the materials I used for this project are available at Art Friend)

Friday, October 8, 2010

Painted Percival


Here he is. The newly painted Sir Percival.

There is no rule or guideline to painting the dried
basic structure of the dog we formed yesterday.
However you want your dog to look is how you will paint it.

For this dog, I used Sakura Poster Paint.
The paint brushes I used are nylon hair brushes.
One fine tip and one medium sized brush.
The paint and brushes are also all available at Art Friend.

Thursday, October 7, 2010

Sir Percival, The Paper Clay Dog

Experiment Number One: Paper Clay Dog.

I recommend you try doing this activity yourself
before letting your child do it on his own.
It's always best that children do these activities themselves,
with us grown-ups in the background to guide them,
not do it for them. This activity is good for 6 to 10 year olds
(it also could be fun for big kids like you and me).


You will need:

• Paper Clay / Modeling Paste
• 4 match sticks
(break in half or to desired length of dog's legs)
• A little water
• Love and patience ~
a common ingredient you'll need
for all art projects with children

Making a Paper Clay dog is simple.
You will need to make 2 oval shaped balls
(1 bigger than the other. 1 for the head, 1 for the body),
2 triangles for the ears, and 1 short (or long)
worm like piece for the tail.


To make all these separate parts fuse together,
add a little water on the surfaces that need to adhere
to one another. Once the body is formed, you can,
with the help of a moist Q-tip, smoothen the surface.
Now that the body is formed, position the match sticks
where the dog's legs should be.

Let the dog air dry over night. Tomorrow, we paint :)
•••


Jovi brand Modeling Paste / Paper Clay is available at Art Friend.