Wednesday, October 22, 2014

Silence at the Night Safari


I started this lesson by drawing stars and a moon on black paper. As I drew a crescent moon, my resident genius disapproved it: "the moon is yellow not blue". And so I changed it to yellow. My little Italian boy got upset and told his friend, "now is banana! why?". I'm laughing inside all this time but I was also feeling elated that the children engaged. I was on to something good.

I had to transport their minds to the night safari. Illustrations of white eyes kept them intrigued since they now had to figure out which animal I was slowly revealing to them. But they're smart, and they figured out most of the animals even before I completed the illustration. Then I drew one eye and told them to identiy the animal. There was silence after that. A long and uncomfortable silence. Some of them zoned out and some were thinking. I told them that I wasn't going to give the answer.  Then! An aha moment for someone! "I know, Miss Itsy! It's a Minion!" Now there is someone who really thought about his answer! I praised him for his thinking process. I explained to them with a 3D toy animal how the view from the side reveals only one eye. Then they understood it fully. I added an ear and other parts until they were able to identify the animal.

Here comes the amazing part of the lesson. I drew eyes on the head at the top middle part of the paper, and the body of the same animal at the bottom right. I told them to think about why there's a great distance from the head to the tail. After a very silent long pause, someone said "the animal has a long nose". I was enjoying this. They are thinking!!! I pushed them to think about it more and told them that yes, there is something long but it isn't a nose. They eventually figured out that it's a giraffe. But this came after another long silent pause in the lesson.

Which brings me to the point of all this. It's tempting for us teachers to fill the silence by providing answers but we can't and shouldn't rob children of the learning process. It's a wonderful scene to witness and an empowering moment for children.

Thursday, October 16, 2014

Rainbow Writing Lower Case Letters

Print these pages back-to-back on A4 sheets. Fold and staple all the pages in the middle. You'll have a homemade rainbow writing book for the three year old children in your class.

Free download. Unlimited sharing :)

Print this way:
(mn+ol) (kp+qj) (ir+sh) (gt+uf) (ev+wd) (cx+yb) (az+abc)


Rainbow Writing Upper Case Letters

Print these pages back-to-back on A4 sheets. Fold and staple all the pages in the middle. You'll have a homemade rainbow writing book for the three year old children in your class.

Free download. Unlimited sharing :)

Print this way:
(mn+ol) (kp+qj) (ir+sh) (gt+uf) (ev+wd) (cx+yb) (az+abc)


1 to 5

Here's a mini city I created that's getting one child interested in counting. We use his own cars to travel from one place to another, filling the available number of parking slots with his cars.

If you need this, feel free to download the images, print it on A3 sheets, and laminate it. Your two and three year old children/students will soon be interested in learning how to count more.


Sunday, July 27, 2014

Animal Masks

I've been tasked to create forest animal masks for my nursery class's school presentation. I've labored over them and I'd like to spare all teachers and mothers the time and effort that is needed to make these masks. So here. Please help yourselves and print them out for whatever use. I hope your children are able to have fun with these masks. Spreading love and animal fun. Sincerely, Itsy
Sunday, November 6, 2011

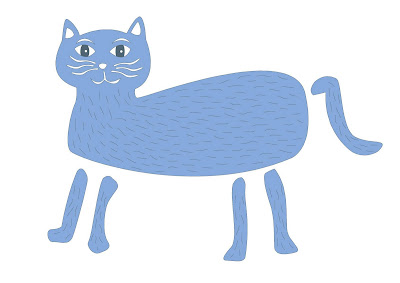
Paper Dolls: Dancing Cat

Experiment Number 12: Paper Dolls

Make a dancing cat for yourself or for the kids!

You will need: Cat print out or drawing, metal eyelets, eyelet punch, laminating machine, laminating pouch


First, draw a cat. You can draw or create a computer generated cat. It doesn't matter. If you think you can't draw a cat, you can! I encourage you to try. And if you really can't, you can trace (or download) the cat pattern I am sharing with you here.


When you draw your cat, remember to make separate drawings of the limbs and tail. You'll understand why in a bit.

Next, cut all the pieces and insert them in a laminating pouch. Then, laminate. For those of you with laminating machines, I think you'll know what to do. For those of you that don't have laminating machines, please do not buy one for this one project. Go to a desktop publishing center and have it laminated. It shouldn't cost too much.


Cut around the different cat parts by leaving about 3 mm between the edge of the paper to your cutting line.


Use an eyelet punch to punch holes through the joints. Where you want to connect the limbs is entirely up to you. If you have no eyelet puncher, you can buy one in a stationery shop. Or, you can also get one in Daiso for 2 dollars and it comes with eyelets. If you don't want to buy one, your desktop publishing house or sewing supply store will also have this service.


Connect all the body parts with the metal eyelets.


Now dance, cat! Dance!


Sunday, July 31, 2011

Art Rage


I have a new program that allows me to create images that look like it has been painted. It's simpler than photoshop, and also more fun. It's called Art Rage. Here's the first painting...

Sunday, June 19, 2011

Fifth Lesson: Dry Oil Painting

Oil painting without the oil?

And of all days, a new child decided to join the class.
Just to try out oil painting.
Since the child's mother said she had no prior experience
to using oils, there would be no point of comparison.
So I carried on.

A peony stencil using a dryish brush
with minimal paint is what completed Ela's painting.


She was so good :) And apparently talented!
(She arranged those leaves on her own)

I let her try out our very first lesson. She did so well!


Fourth Lesson: Chinese Inspired Paintings with Plaster of Paris

It's too bad that I don't have pictures of the finished art works.
Someone forgot to bring her camera that day!

But here's what happened.
The children poured plaster of Paris
into Chinese themed molds
(rabbit, double happiness, pig, koi),
to create a relief on their painted backgrounds.

Here they are enjoying mixing the plaster.


And painting the background.


What came out of the rabbit mold :)