Sunday, November 6, 2011

Paper Dolls: Dancing Cat

Experiment Number 12: Paper Dolls

Make a dancing cat for yourself or for the kids!

You will need: Cat print out or drawing, metal eyelets, eyelet punch, laminating machine, laminating pouch


First, draw a cat. You can draw or create a computer generated cat. It doesn't matter. If you think you can't draw a cat, you can! I encourage you to try. And if you really can't, you can trace (or download) the cat pattern I am sharing with you here.


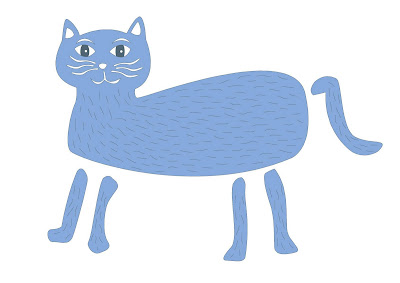
When you draw your cat, remember to make separate drawings of the limbs and tail. You'll understand why in a bit.

Next, cut all the pieces and insert them in a laminating pouch. Then, laminate. For those of you with laminating machines, I think you'll know what to do. For those of you that don't have laminating machines, please do not buy one for this one project. Go to a desktop publishing center and have it laminated. It shouldn't cost too much.


Cut around the different cat parts by leaving about 3 mm between the edge of the paper to your cutting line.


Use an eyelet punch to punch holes through the joints. Where you want to connect the limbs is entirely up to you. If you have no eyelet puncher, you can buy one in a stationery shop. Or, you can also get one in Daiso for 2 dollars and it comes with eyelets. If you don't want to buy one, your desktop publishing house or sewing supply store will also have this service.


Connect all the body parts with the metal eyelets.


Now dance, cat! Dance!


Sunday, July 31, 2011

Art Rage


I have a new program that allows me to create images that look like it has been painted. It's simpler than photoshop, and also more fun. It's called Art Rage. Here's the first painting...

Sunday, June 19, 2011

Fifth Lesson: Dry Oil Painting

Oil painting without the oil?

And of all days, a new child decided to join the class.
Just to try out oil painting.
Since the child's mother said she had no prior experience
to using oils, there would be no point of comparison.
So I carried on.

A peony stencil using a dryish brush
with minimal paint is what completed Ela's painting.


She was so good :) And apparently talented!
(She arranged those leaves on her own)

I let her try out our very first lesson. She did so well!


Fourth Lesson: Chinese Inspired Paintings with Plaster of Paris

It's too bad that I don't have pictures of the finished art works.
Someone forgot to bring her camera that day!

But here's what happened.
The children poured plaster of Paris
into Chinese themed molds
(rabbit, double happiness, pig, koi),
to create a relief on their painted backgrounds.

Here they are enjoying mixing the plaster.


And painting the background.


What came out of the rabbit mold :)

Third Lesson: Collage

First, they planned their collage by laying out all the elements.


Leandra planned.

Justine picked up a little trick from the previous lesson
of animal patterns and integrated it with her signature stripes!


Grace, as always, is inspired.


And Georgia fused the east and the west.


Drum roll please...

they always come up with something wonderful.
I love these children!

Second Lesson: Painting a Triptych

They planned what colors to use.


Then they mixed their colors.


Then they painted. One panel at a time.


We played around a bit during break time.


And voila!!! The triptychs were done!


Saturday, May 14, 2011

First Lesson: Shading, Light and Shadow

I had my first session with my second batch of young masters
at Impressions Art Studio, Cluny Court.

Here are the works of the 8 year olds I worked with today.

They grasped the concept faster than any adult I've worked with.

I am starting to believe that as children, we are all gifted.
As we get older, we forget about the talents
that have been given to us.

•••

The subject.


The paintings.


Thursday, May 12, 2011

The Brass Bird Ring

The latest ring in my store.
A beautiful brass bird landed in the secret garden!
She flew* in all the way from Hoi An, Vietnam.
The plants and their berries took an instant liking
to this special bird. So everywhere the bird goes,
the plants and berries are surely there.. There's a special everlasting
dew drop that follows the bird around, too.
Every time the bird gets thirsty, he raises his head
to take a sip from the everlasting dew drop above his head.

(*I found a bunch of these brass figures when my husband and I
took a trip last October 2010 to Hoi An, Vietnam.)

Meditation Ring


Welcome to my Secret Garden.
This is a place where things grow and bloom & flutter & fly!

Imagine a garden that never needs watering.
Yet everything in it still shines and blooms.
Glass, crystal, clay and semiprecious stone -
always alive and always so colorful!

There are no weeds in these gardens, I assure you.
A worm or two may pop up in some of them once in a while though :-)

~

A peaceful statue of Buddha is in the Secret Garden
where there is only pure silence. Animals, berries, plants
and visitors come to this area when they need to meditate
or want a huge dose of peace and serenity.
The plants have offered Love, Peace and Hope Berries
to Buddha while the plants in the area
seem to be growing so quickly!

This ring is best used when we need a reminder to return
to a more peaceful place. Stare at it to meditate any time of day.
It'll be quite handy since you have it on your finger anyway :)

The Buddha miniature is made of brass.


Wednesday, May 11, 2011

Balloon Printing

Experiment Number 11: Balloon Printing

You will need: acrylic paint, small balloon (inflated),
paper, scissors, paint palette

Print different blotches of colours
in different areas of your paper.


You can achieve this by using a balloon (like the one seen below).
Pour the different colours of acrylic paint on the paint palette.
Dip the balloon into your paint and stamp away on the paper!!!
It isn't a must to clean your balloon when switching colours.
Try leaving it smeared with the previous colour you used
and see what happens when you make a new print.


Once the paint is dry, decide on what it is you want to create.
Cut out the shapes of your design.


On a new sheet of paper, paint your background.
Once your background is dry, stick everything you've cut out
on the paper you painted a background on.

Have fun with this one!!! I did :)


I learned this from a lovely woman
that's teaching me how to be a teacher :D

Painting with Marbles

instructions coming soon...

Nature Collage

instructions coming soon...


This Dinosaur was made by my classmate
(in my Early Chidhood Education Course), Sze Ying.

She's got other works I've got to share with you.

Faux Mosaic

instructions coming soon...

Art Using Cotton Buds and a Straw

instructions coming soon...